Technical Support技术支持
CONTACT US
 400 179 0116
24-hour service hotline marketing@ldraft.comE-mail
Extraction and Culture Protocol of Melanocytes
source:QiDa technoligy views:1594 time:2023-10-26
Melanocytes are melanin producing cells that exist in the skin, inner ear, nervous system, and heart (Li, 2014). Melanocytes and their precursor cells, also known as melanoblasts, originate from neural crest cells. Understanding the ontogeny of melanocytes is a key field in developmental biology and is of great significance for human health, as evidenced by the numerous human diseases associated with melanocyte lineage cell defects. So how do melanocytes separate?
The first step is to prepare the reagents:
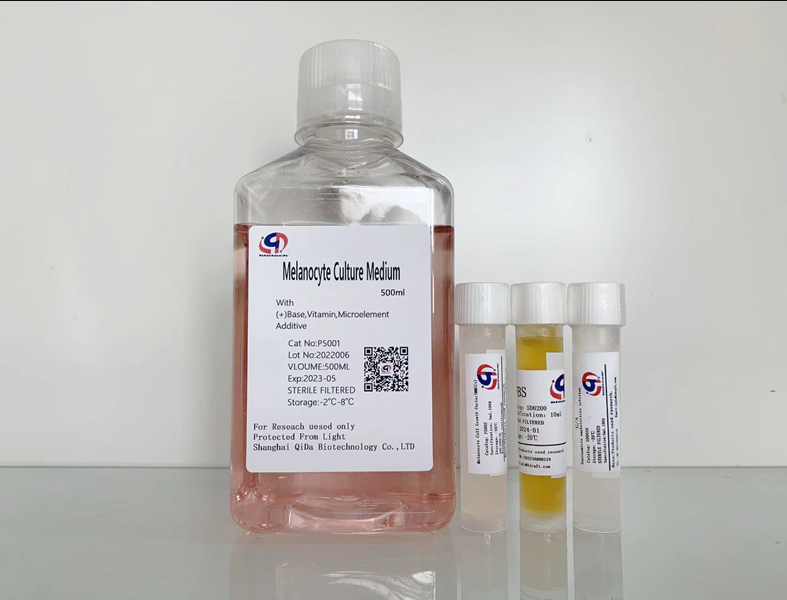
Melanocytes, MM melanocyte culture medium (Qida Biological, product number: P5001), pancreatic enzyme, PBS, FACS, etc
1、 Culture of feeder layer cells:
1. Maintain ST2 cells in ST2 medium. The procedure for processing cell cultures from T25 tissue culture bottles is as follows. All steps are carried out aseptically in a laminar flow biosafety cabinet.
2.Once the ST2 culture reaches 80% convergence, remove the growth medium by suction.
3. Gently add 5 mL of warm (37 ° C) sterile PBS free of Ca2+and Mg2+, rinse the cell monolayer and remove by suction.
4. Trypsin the cells, add 1mL of 0.25% trypsin/EDTA solution, and place the cells in a cell culture chamber.
Check the degree of cell detachment through a phase contrast microscope every 2-4 minutes.
5.Once about 90% of the cells are separated, add 7 mL of warm (37 ° C) growth medium to inactivate trypsin and gently mix the cell suspension to produce a single cell suspension.
6. Transfer 1 mL of cell suspension to a new T25 cell culture bottle containing 5 mL of warm (37 ° C) growth medium. Gently mix and place the cells in the incubator.
7. In order to maintain exponential cell proliferation, extract the growth medium every three days and replace it with 5mL of fresh growth medium. Do not allow the culture to achieve fusion of over 80%.

2、 Preparation of feeder layer cells
1. After trypsin digestion of ST2 cells cultured in a T25 flask, transfer the cell suspension to a 15mL conical tube.
2. Place cells at a temperature of 200 ° C × Centrifuge for 5 minutes. Suck the supernatant and gently resuspend the cell precipitate in 1 mL of warm (37 ° C) RPMI growth medium.
3. Measure cell density using a hematocytometer and adjust to 70000 cells/mL by adding an appropriate volume of warm RPMI growth medium.
4. Add 100 μ Add L cell suspension to place at 35mm μ Insert 4 wells into each well of the dish (7000 ST2 cells/well) and culture overnight.
Note: Using optical grade plastic μ- Culture dishes can achieve high-quality imaging and optimal cell adhesion and diffusion.
5.On the second day after planking, the ST2 growth medium was removed by suction before separating and purifying the target melanocytes (see below).
6. Add 100 to each hole μ A warm (37 ° C) fresh culture medium composed of a 1:1 mixture of melanocyte growth medium and ST2-RPMI growth medium.
7. Return the ST2 feeder cells to the incubator.
3、 Isolation of melanoblasts from target embryos
1.After four days of single dose IP administration of tamoxifen (step B4), pregnant rats were euthanized at 15.5 dpc by inhaling carbon dioxide or excessive use of isoflurane in accordance with appropriate institutional approved animal care ethical procedures.
2. Lie the animal on its back on an absorption pad and soak its chest and abdomen in 70% ethanol.
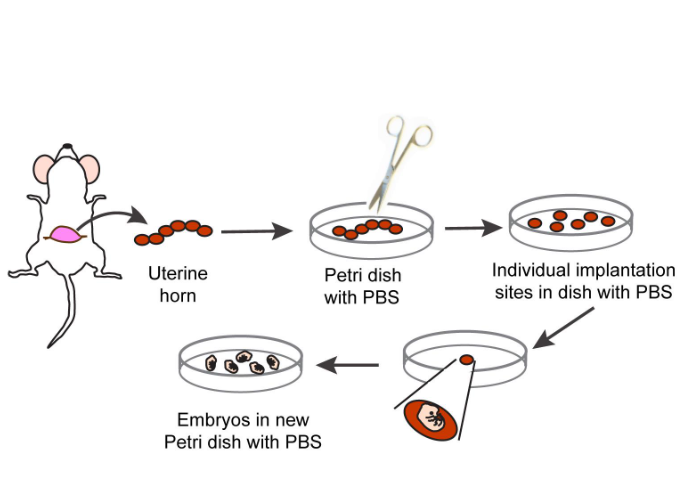
3. Gently pinch the abdominal skin below the center of the abdomen with pliers and make a small incision on the midline with surgical scissors to ensure that the abdominal cavity is not cut open. Cut the skin along the midline of the abdomen and gently pull it to both sides to separate it from the abdominal cavity below, exposing the uterus (Figure 1).
4. Gently remove the uterus containing a string of embryos from the body cavity using pliers. Transfer the uterus to a culture dish containing sterile PBS and maintain room temperature (22 ° C). Separate the embryo by carefully cutting along the uterine horn between the implantation sites (Figure 1).
5. Embryo separation is performed under a stereoscopic microscope. To achieve this, transfer a single embryo and related uterine tissue to another culture dish containing PBS. Save the embryo in PBS, use tweezers to peel off the muscular uterine layer from the embryo, and then remove the decidua and placental cone.
6. Gently tear the yolk sac with pliers and gently tear the umbilical cord to completely separate it from the embryo.
7. Transfer the embryo to a sterile tissue culture dish containing PBS and place it on ice. At this stage, a small segment of the embryonic tail can be removed and genomic DNA extraction and genotyping can be performed if necessary (Figure 1)

8. Transfer the embryo to a culture dish containing sterile PBS placed on a stereoscopic microscope table.
9. Use forceps to keep the embryo in a prone position, and use a surgical knife to gently make a shallow longitudinal dorsal incision along the midline below the head on the entire fetal body to avoid deep incisions that may cause organ exposure.
10. Using scissors, gently and gradually separate the skin from the body starting from the incision point closest to the neck.
Note: Embryonic skin is very fragile. Use one pair of pliers to grip the embryo through its head, and use another pair of pliers to gently separate the skin from the fetal body.
11. Float each harvested skin in a sterile culture dish containing cold sterile PBS. Continue to collect the skin of all remaining embryos.
12. Carefully transfer embryonic skin using tweezers into sterile conical tubes, each containing 500 μ L sterile 2.5% trypsin.
Note: If a single embryo needs to be analyzed, it can be analyzed at a concentration of 500 μ Digest each skin in a 2mL micro test tube containing 2.5% trypsin, and then chop it into small pieces.
13. Use small scissors to cut the skin into approximately 2 millimeters × A 2mm fragment was gently shaken and incubated at 37 ° C for 10 minutes. Upon visual observation, the skin had almost completed digestion into a flocculent substance. 1mL of trypsin neutralization solution was added and gently mixed.
14. Pass 40 μ A sterile cell filter with an aperture of m filters the cell suspension into a 15mL sterile conical tube to remove tissue fragments.
15. To obtain a single cell suspension, gently pass the filtered cell mixture through a 5 or 10mL syringe containing 21G needles 10 times at 140 ° C × Centrifuge for 5 minutes.
16. Carefully remove the supernatant by suction to avoid interfering with cell sedimentation.
17. Between 300 and 500 μ Resuspension embryonic cells in the cold FACS sorting buffer.
Note: Resuspension of cells in a larger volume of FACS sorting buffer will result in a decrease in flow rate and an increase in sorting time, leading to a decrease in cell viability.
18. Transfer the cell suspension to a 5 mL BD Falcon glass tube and place it on ice.
19. Immediately perform cell staining and FACS purification of melanocytes.
20. Classify cells into sterile tubes containing cold melanocyte culture medium.
21. Divide the sorted cell suspension into small portions in the sorting machine, seal the test tube containing the remaining sorted melanocytes with a lid, and transport it to the cell culture room for subsequent seeding.
22. Inoculate the selected GFP positive melanocytes into a 35mm fusion monolayer containing previously prepared ST2 feeder cells μ- Insert the culture dish into the well (Part D) and incubate at 37 ° C.
Note: The average number of GFP positive melanocytes obtained from each embryo is approximately 500 (ranging from 50 to 1400). Melanocytes obtained from 4-8 embryos can merge into one well.
23. After 16 hours of sorting, gently remove the extracted growth medium using a pipette to avoid interference with the cell monolayer, and replace it with fresh growth medium.
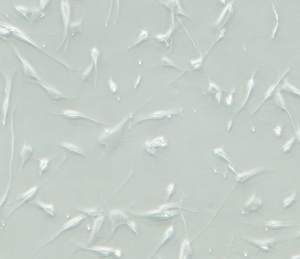
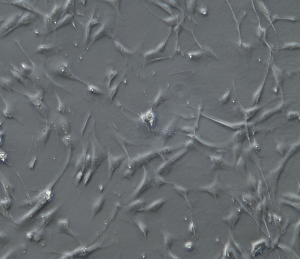
Note: After 16 hours of inoculation, approximately 70% of melanocytes will fully diffuse and begin to exhibit dendritic morphology (as shown in the figure below).


Reference:
1.Abdallah, B. M., Alzahrani, A. M., Abdel-Moneim, A. M., Ditzel, N. and Kassem, M. (2019). A simple and reliable protocol for long-term culture of murine bone marrow stromal (mesenchymal) stem cells that retained their in vitro and in vivo stemness in long-term culture. Biol. Proced. Online 21(1): e1186/s12575-019-0091-3.
2.Adameyko, I., Lallemend, F., Aquino, J. B., Pereira, J. A., Topilko, P., Müller, T., Fritz, N., Beljajeva, A., Mochii, M., Liste, I., et al. (2009). Schwann Cell Precursors from Nerve Innervation Are a Cellular Origin of Melanocytes in Skin. Cell 139(2): 366–379.
3.Bosenberg, M., Muthusamy, V., Curley, D. P., Wang, Z., Hobbs, C., Nelson, B., Nogueira, C., Horner, J. W., DePinho, R., Chin, L., et al. (2006). Characterization of melanocyte-specific inducible Cre recombinase transgenic mice. genesis 44(5): 262–267.
4.Chevalier, C., Nicolas, J. F. and Petit, A. C. (2013). Preparation and Delivery of 4-Hydroxy-Tamoxifen for Clonal and Polyclonal Labeling of Cells of the Surface Ectoderm, Skin, and Hair Follicle. In: Turksen, K. (Ed.). Epidermal Cells (pp. 239–245). Methods in Molecular Biology. Springer, New York.
5.Crawford, M., Leclerc, V., Barr, K. and Dagnino, L. (2020). Essential Role for Integrin-Linked Kinase in Melanoblast Colonization of the Skin. J. Invest. Dermatol. 140(2): 425–434.e10.


